Copyright

(c) 2009 - 2025 (MEM)

Please keep in mind that, unless otherwise noted, everything on my blog is copyright material of some sort. Either by me (as picture taker, writer, creator) or more importantly by the designer of the needlework pieces I present. If you promise to be copyright mindful, my promise to you is to do my best to provide you enough information in my post for you to obtain your own legal copy. Please be respectful of these copyrights and not take business away from our wonderful designers. Thank you.
............. . ."She looks for wool and flax and works with her hands in delight" Proverbs 31:13 NAS


Friday, October 17, 2025

New Sewing Cabinet

I bought myself a birthday present and my hubby put it together while I was visiting family in California. When I came home, my beautiful Harriet Cabinet made by Arrow Sewing Cabinets was ready to go. We put it under the window in the library and there is a lot of light as plenty of room, when I open it up. I purchased mine from Sewing Parts Online, but there are other sellers out there, including directly from the manufacturer. 


I also purchased a clear insert for my machine. The cabinet comes with a removable wood insert to match the cabinet and fill in the space for the machine to keep the surface area flat. My first project using this new set up was a case to protect the wood piece since I have the clear insert to match my machine. All this may make more sense to sewers with a similar set up, sorry if you are confused.


Pretty basic, but I discovered my cabinet puts my machine at a better height. I have been sewing on my desk top all this time and the machine was higher. When in the cabinet and flush with the top (thanks to the clear insert) my line of sight is much better, and I can see what I am doing. Who knew? Someone else, I am sure.


Thanks for stopping by!!

Wednesday, October 15, 2025

Stretcher Bars

 How many stretcher bars does a person need??


Of course, I don't have the ones I need (10" mini or 14" regular)! But I am wondering if I really need 8 pairs of 12" or 6 pairs of 8" etc. Please post your ideas in the comments. Thanks.


Sunday, October 12, 2025

What I am working on this week

I am back to working on Moonlit Desert as part of my rotation system. I developed this system a number of years ago to help me reduce my stash. I have six categories of projects (different from the last time I used this system). Within each category is a list of projects, which are numbered. I use a random number generator to pick a project to work on. This helps me pick something when I can't decide what I want to stitch. But it is not cast in stone; if the number that comes up does not quite trip my trigger, I pick a new number.

The plan is to start a project each Sunday and work on it for 7 days. If it is not finished, I pick it up when the category it is in comes up next. If I finish something during the 7 days, I can go back to something I am already working on or pick a new project from the category. Or basically whatever I want.

When I last posted about this some people thought it was too confining. But it does help reduce my stash, help me decide on what to stitch if I am undecided. Also, it is my system, and I can do what I want with it, so if I decide to work on something off the list, I do. Stitching should be fun after all.

My categories are: WIPS (1-31), Bins (1-264) White Cab (1 - 43), Flowerboxes (1-81), Studio (1 - 78) & Stitchers Choice. You can see by the numbers I am doing a fine job creating my SABLE (Stash Acquired Beyond Life Expectancy). Although to make life easier on me, when I finish a numbered item, I cross it off rather than renumber everything, so I don't have quite as many projects as it seems.  The categories mostly relate to where these things are stashed and are either complete kits or partials. They do not include my file cabinet full of just charts. So, I guess this is my confession of being a stitching addict - SURPRISE!!! 

That was a long way to tell you about Moonlit Desert. I am at the point of filling in the background - not super fun, so I may work on something else periodically to keep me from getting bored. 


Happy Fall All Y'all


Monday, September 29, 2025

Gift Stitching/Baby Quilts

Well, I am back from my trip to California to attend two baby showers and can now show you the gift stitching.

My nieces are each having a baby girl a week apart in November, and had their baby showers a week apart. So, I spent 9 days in California to attend each. Did I tell you they are fraternal twins?

Twins or not, they are still very different people and one has a dinosaur theme, while the other has a woodland creatures theme.

I found two cute stamped cross-stitch "kits" (tops only) from Jack Dempsey Needlework:

Dinosaur is a quilt top I stitched, and I wasound some cute fabric for the backing. There was approximately 113 hours of stitching. It was a bit slow because it is one big piece of fabric to work with. Finished size is 32" w x 48" t, after trimming. 


Next is Woodland Creatures. It came as one sheet with 12 squares. I cut the squares out to make it easier to stitch and it took me a little less time to stitch (approx. 89 hours) but a tad longer to make into the quilt. I had to turn the 12 stitched squares into blocks then add sashing, etc. It is 34" x 35". I did not follow the finishing instructions and added the corner squares to make it easier to line up - as suggested by my more experienced quilting friends.


Not counting a few placemats and table toppers these are my 3rd and 4th quilts I have ever made.

I had a great time making the quilts and celebrating the good news!


Happy Stitching!


Monday, September 22, 2025

Shimmering Shore

I signed up for a Shining Needle Society class, Shimmering Shore by Patricia Hartman. We have had two lessons so far, and I have finished them. Wow, I am up to date!

We had three color choices. I chose olive and maroon on ecru 18-count mono canvas.


The border was the first thing we put in (the dark green) and makes the size approx. 8.5" x 4.5"
There is a nice variety of stitches and fibers used so far. I am enjoying it and can't wait for lesson 3!

Happy Stitching!


Sunday, September 14, 2025

Halloween Stitching from Mill Hill

I finished my gift stitching, but I can't post about it yet. I did pick up some fun Halloween projects from my stash to work on this week and continue my stash reduction quest. Try not to laugh. 

All are from the Tiny Treasure Diamond Series (set of 6) with finishing instructions and (c)2009.

Each is approximately 3"x 3", not including the hanger and tassels and is lightly stuffed with poly fill..


Above, from left to right: 
Pumpkin Duo MH22-9201. Trick or Treat MH22-9201 & Starlight Ghost MH22-9205 (includes glow-in-the-dark thread).


Above, from left to right:
Goblins Welcome MH22-9202. Kitty Witch MH22-9204 & Spooky Spider MH22-9206.

The instructions for finishing and making the hanger and tassels were easy to follow. I did make the hanger quite a bit shorter than the instructions listed.


Happy Stitching! 


Sunday, August 31, 2025

Gift Stitching & Moonlit Desert

It has been a little quiet here in blog land. I have been working on some gift stitching, and I am not sure if the recipient reads my blog. The stitching is done so now on to the finishing. I will post photos once the gifts are received so stay tuned.

I can show you where I left off with Moonlit Desert. It is on 32 count and the design is 2.5" x 10". It uses Kreinik ombre in some areas and boy to I hate that thread. Very short lengths or is shreds in the middle! I think I will finish it as a bell pull if I can find the right hardware.


HAPPY STTITCHING!!


Saturday, August 9, 2025

Moonlit Desert

 This is my newest project - Moonlit Desert by Fireside Originals (c) 2002.


I have been stitching on it since Sunday, August 3, usually during baseball games, but other times as well. Here is my progress so far.


It calls for some not-so-fun threads - Kreinik Ombre, for example. I suggest very short lengths, it kind of shredded (unraveled) mid-stitch. When completed, it will be about 2.5" x 10" and I will probably turn it into a bell pull. Stay tuned.


Happy Stitching!!


Thursday, August 7, 2025

Brite- Eyes Update

This is a Halloween canvas piece by Margaret Bendig called Brite Eyes. It was the October 2021 EGA Stitch-along. I told you about it on July 16, 2025. I finish-finished it with beads and ribbon and thought I would share. I am still deciding about feet.


BOO!


Friday, August 1, 2025

Some Beading

I pulled a few kits from my beading box and finished them. This is the focal point for a necklace. It is a Mill Hill Kit (c) 2002 called Beaded Flower Necklace.  It was interesting to make and a bit fiddly.

 Then I pulled out Bracelet with an 'X'. (c) 2002 by Rypan Designs. I purchased it at a bead show many years ago. I uses 8/0 beads and crystals. It does call for two needles and it was one of the easier two-needle projects I have done, and I would make it again.


That is all for now!!


Wednesday, July 30, 2025

Caroline's Mini Lights

This is a freebie chart from Rainbow Gallery (c) 2008 which I have had in my stash for a while. It is called Caroline's Mini Lights designed by Sally London for Rainbow Gallery. I checked the Rainbow Galler website Free Needlepoint charts section and could not find it there anymore.

It is meant to make individual ornaments, but I did not want to mess with dealing with small stuff,  so I made it look like a string of lights instead. It also called for metallic gold 18 count mono canvas which I did not have. But I did have an 18-count interlock with the gold threads, and I used that. I also used different threads than those listed. I did use the suggested stitches. This was a stash reduction project for sure! Each light is about 1.75" wide by 3" tall.

Now I just need to decide how I want to finish-finish it.


Happy Stitching!!


Monday, July 28, 2025

Holiday Patches Finished

I last told you about this piece on June 13, 2025. I planned to work on it every Tuesday as my project to work on during club meetings, but after last Tuesday, I could not put it down and now it is complete.


It is 10.5' Tall x 10.75" wide.

It was fun to do. I had to make a decision on embellishing the fabric. I did not want to distract from the pretty fabric or embellish it so much as to distract from the stitching, so I decided to just stitch a little bit on the fabric. I had some fabric leftover to practice on. I tried beads for the berries and French knots. I thought the French knots showed up better and went with that. I also did a mix of fly stitch and straight stitch in #4 Kreinik braid 002HL for the pine needles.

Below is a closeup of the larger center fabric when completed.


I think I will frame this without glass since it will be stored and moved in and out of storage for Christmas time. I may make a fabric case for it for storage as well. Time will tell.

Happy Christmas in July!


Friday, July 25, 2025

Now For Some Beading

I pulled this project out of my beading box with kits and gave it a go. It is Intermediate Spanish Knot Bracelet I purchased at Bead World in Phoenix, AZ. They have a website. I am not sure if they still sell this kit, however. 


I have not done much macrame and I am more of a beginner than an intermediate, so I had a little trouble figuring out the knot. I found this youtube video that was VERY helpful.

I can't wait to wear it!!

THANKS FOR STOPPING BY!!


Wednesday, July 23, 2025

Lavender Sachet and a Christmas Ornament

 I have been working on stash and WIP/UFO reduction this year. Here are some more finishes.

This is Honeysuckle. A lavender sachet kit I purchased at my local needlework shop when I lived in Colorado. It is from The Textile Heritage in Scotland. It is about 2" by 3".


Then I pulled out a painted canvas and turned it into our 2025 Christmas ornament. My hubby played trumpet in his high school band, so this one is for him. No stitch guide. I used Kreinik braid from my stash and Father B's Background stitch in green and red floss.

I finished it to hang with the mouthpiece up because my hubby said that is how it is held. For the red edging around the piece, I used Marion Scoular's corded edging technique from her book Advice is ... for listenting not necessarily taking!! 

This is the back. It is about 2" x 5"


Happy Christmas in July!!


Monday, July 21, 2025

Summer Motifs Block

I posted about one of these I did for Halloween on October 13, 2010.

It was a monthly kit I purchased from Fireside Stitchery in 2003. A painted canvas by Kathy Schenkel. For more information, you can click on the October 13, 2010 link above to the previous post.

This is how it looks when stitched.

This is it finished as a cube. Kind of pain to finish, but I managed. 


Happy Stitching!!


Friday, July 18, 2025

Roses...in a Country Garden

I picked up this cute little kit during my trip to Scotland in 1995. It came with a presentation folder to create a small greeting card, which is 3 5/8" x 4 5/8". 

I thought it would make a nice example of the importance of backstitching (BS). The first photo below shows it with the back stitch barely started at top right (because I forgot to take the photo before I got started on the BS). The second one is the finished project (before ironing and placing in the card). 


This was an interesting project to stitch because it wanted me to start at the bottom right and it worked the actual cross stitch the opposite way I make it. I make my crosses with the first leg from bottom left to upper right and the second leg is from lower right to upper left. They showed it with the first leg from lower right to upper left and the second leg from lower left. to upper right. Either way, when you start at the bottom of the chart, you come up in a dirty hole. 

I stitched my usual cross and started at the place they indicated. Time to stitch was about 9 hours and 33 minutes. It worked out. Plus, how can it be bad when it is in my favorite color - peach!!


Have a GREAT day!!


Wednesday, July 16, 2025

Brite Eyes

This is a design by Margaret Bendig called Brite Eyes. I plan a trip to Hobby Lobby for some pins, beads, ribbon and items for feet for the finish finishing.

I used glow in the dark DMC floss, but it was not super vibrant, so I added some glow in the dark Kreinik blending filament to it. It called for glow in the dark Kreinik braid for the yellow eyes and green collars on the cats, so lots of glow in the dark!!


Recently, I started a stitching journal of sorts.  So far, I am enjoying it. I can get a rough guide on how long I stitched on a project. So, this one took me about 13 hours and 35 minutes. Now that I know this, no one will ask me how long it took to make!

 HAPPY STITCHING!!

Saturday, July 12, 2025

Ribbon Embroidery

 For the June Festival Stitchers program, I designed and taught this 5"x 7" greeting card. 


I designed it a bit on the fly, and I was not sure what I was going to turn it into. When I finished it, I thought about putting it in premade card blanks. But my design was a bit too wide. Since I also dabble in paper crafts, I had an oval die cut and cardstock I could use to make my sample above, but I needed something for class. So, I went back to the drawing board and made a few adjustments, so I could teach it to fit into premade card blanks with the oval already cut out. 

I gave everyone an option of Ivory or white cards and aida cloth. We use ribbon from the club's stash. We sometimes get donations from people who no longer stitch or have passed away, and one of these included a bunch of silk ribbon.

I used my book An Encyclopedia of Ribbon Embroidery Flowers 121 designs by Deanna Hall West, American School of Needlework (1995), to decide on the flowers.


Have a great day!!


Thursday, July 10, 2025

Kreinik Braid & Storage

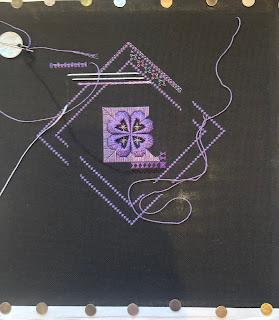
 When I took the Purple Hearts class, it used quite a bit of #8 Kreinik braid, so the instructor gave us a 50M cone! Now that Rainbow Gallery owns and manufactures the braid, it is on a card. Below is a photo of these three styles, which need to be stored somewhere!


I store my Rainbow Gallery thread in 12"x 12" drawers in a setup for paper crafts. I converted the top two drawers from paper to Rainbow Gallery Threads. I made dividers and so far, it is working out great!

I store my metallics in a floss bobbin case, which is inside a 12" x12" scrapbook paper box with a lid. I labeled this box metallics, and luckily, there is room for the cone. But I don't want the same thread in two places, so for now I am just going to lay the one card I have so far on top of the spools and call it good. I will revisit it if (who am I kidding, when) I get more cards. 

l

The fun fact about the new cards from Rainbow Gallery is that they hold 11M, while the spools only hold 10M. 

HAPPY STITCHING!


Tuesday, July 8, 2025

Purple Hearts Continued from 2010

I last talked to you about this project on July 11, 2010.

I picked it back up on June 27 and have been working on it almost every night since. 

It is on 24 count black congress cloth and has been a challenge in places, but I have tons of light working and magnification. I have only ripped out stitches a few times! I am now going back to section 8, which is black on black. UGH!

Here are some photos of my progress.


How it looked when I picked it up on June 27. If you compare it to the July 11, 2010 post, you will see it is exactly the same!


Here I finished the center and cleaned up all the "spaghetti" left over from class.


June 28 working on area 5.


July 8, 2025, Areas 1 - 7 completed. 
The close-up below shows a little bit of the black on black I did back in 2010 (lower left of the center square). It is the next area to complete. UGH. 


After this area, I go back to area 4 & 10 to add beads. 

I am working on reducing my WIIPs and this one was the one I pulled out of my WIP cupboard. I have 31 projects in the cupboard (including Purple Hearts). It does make me wonder when a WIP (Work in Progress) becomes a UFO (UnFinished Object) or visa versa. 

HAPPY STITCHING!!


Friday, July 4, 2025

Happy Fourth of July

In the United States, we are celebrating 249 years of Independence on July 4. So, while I wish everyone everywhere a happy fourth, it means a bit more here. 

I have a display of Red, White, and Blue I put out in May (for Memorial Day), June (for Flag Day) and July (for Independence Day). It is a mix of stitching and papercrafts, plus a table runner I received as a Christmas gift one year. 


Happy Day, Wherever You Are!!


Wednesday, July 2, 2025

States Completed

I finished the last three states from the Statehood Splendor series from Thead Milk Designs. I posted about the other states here.  Fairly self-explanatory what they are!


For Arizona, I used Weeks Dye Works Lancaster Red instead of the Gloriana silk it called for. This was a stash reduction project.


Here is the final grouping and I guess now you know all the places I have lived! Next in this project is either the Victoria Sampler set or the Janlynn Designs set (mentioned in previous blog post linked to above), time will tell.


HAPPY STITCHING!


Sunday, June 29, 2025

Some Framing

I decided to go with the frame I found on Amazon that said it had a 5"x5" opening. That sounded fine since the finished size was 4.5" x 4.5". I was surprised when it came with a double mat (glued to the first mat) that made the actual opening 4.5" x 4.5". Luck was on my side this time.


I also had a frame with a funny dog saying that I was not crazy about the ceramic dog that was inside, so I found a dog design on page 43 in 365 Tiny Cross Stitch Designs by Kooler Design Studio published in 2000 by American School of Needlework. I added the hearts to fill in the space above.


On a side note, I really like the book I mentioned above, it has a lot of nice designs. I am not sure if it is still available, but worth a hunt, at least in my opinion.


Happy Stitching!


Friday, June 27, 2025

State Charts

Over the years, I have collected various kits or charts for the states we have lived in. I have Hearts of America by Victoria Sampler, America the Beautiful by Janlynn and Statehood Splendor by Thread Milk Design

This past week I picked up the charts for Statehood Splendor by Thread Milk Designs. I changed a few of the threads using what I had on hand and I did order some as well.

My grand plan is to stitch everything from all the designers and sew them together into a quilt or wall hanging. So, I wanted the ones from the Statehood Splendor group to be on the same fabric. It calls for 36 count, but I am attempting to work from stash, so I am using some 25 count Laguna in the color bone. They end up about 4 inches square.

First is California, I used Gentle Arts Country Redwood, the design called for Valdani Old Brick, which I did not have on hand, but I did have the Gentle Arts.


California is followed by Nebraska.
It called for Weeks Dyeworks (WDW) Cayenne, which I did not have.  I used WDW Louisiana Hot Sauce. I also had to sub out the black. It called for Valdani Khaki Black. I used WDW Charcoal.


Which is followed by Iowa
It also called for Valdani Old Brick, which I subbed out like I did for California.


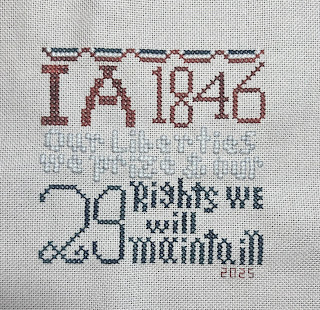
The designer worked it as red, white and blue top to bottom. But the center white area of the state motto did not show up well on the bone fabric. So, I outlined the words in DMC #03 a medium grey. The photo below shows the back stitch in progress and last photo shows the finished piece.


I have three more states to go! They work up fairly quickly and the designer includes a half-page of information about each state, which has been interesting too.


Happy Stitching!